FREE MOUSE TEST
Mouse Polling Rate Test: Measure Hz & Input Rate
Curious if your mouse is delivering its advertised speed? This tool measures your mouse polling rate in Hz and shows real-time consistency with a live graph and stability score. Get instant feedback on your input performance directly in your browser.
Benchmark compare
- Office mouse— 125 Hz
- Gaming (1 kHz)— 1000 Hz
- Pro wireless— 2000 Hz
- Flagship wired— 8000 Hz
Tip: disable battery saver, use a wired connection, and keep this tab focused for best results.
What Does This Tool Do?
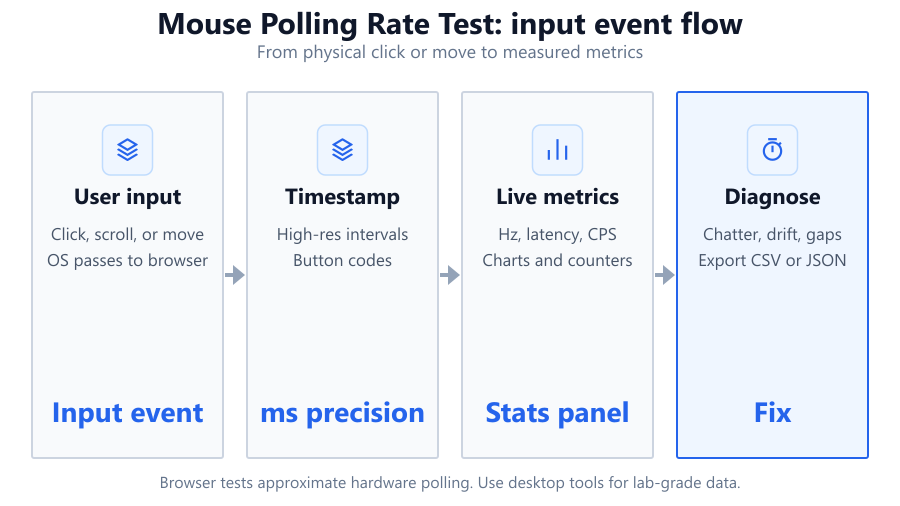
This Mouse Polling Rate Test lets you check how often your mouse reports its position to your computer, measured in Hertz (Hz). Higher polling rates mean your mouse sends updates more frequently, reducing input lag and improving tracking precision, which is crucial for gaming or detailed work. The tool captures mouse movement data using your browser, analyzes the time between each detected input, and calculates a range of metrics: live Hz, average, median, 95th percentile (P95), minimum, and maximum. It visualizes these results in a live graph and assigns a consistency score. You can view tier badges for standard polling rates from 125 Hz up to 8000 Hz, compare your results against typical office and gaming mice, and export your session data as CSV. The tool also supports touch move input, making it versatile for laptops and tablets. While the results are highly informative, the analysis is limited by browser timing precision and your operating system’s input stack. This is not a lab-grade measurement, but the results are accurate enough for most troubleshooting and comparison needs.
How to Use This Tool
Using the Mouse Polling Rate Test is straightforward. Open the tool in a modern browser such as Chrome, Edge, or Firefox on your Windows, Mac, or Linux system. There’s no software to install, and it works with any USB, wireless, or Bluetooth mouse.
- Move your mouse cursor in the test area. Try to keep movement steady and consistent for the most accurate readings.
- Watch the live graph update in real time, displaying your measured polling rate in Hertz and the consistency gauge.
- Choose your preferred time window: 30, 60, or 120 seconds. Longer sessions provide a more reliable average, especially if your mouse has variable polling or wireless interference.
- After finishing, review the summary statistics: average, median, P95, min, and max Hz. Tier badges show which standard your mouse meets, from basic 125 Hz up to cutting-edge 8000 Hz.
- Use the compare feature to see how your results stack up against popular office mice, like the Logitech M185, or gaming models, like the Razer DeathAdder V3 Pro.
- Export your session as a CSV for offline analysis or record keeping.
If you are on a touch device, you can use your finger or stylus to test input polling. For best results, close other heavy browser tabs and avoid background downloads, as system load can impact measurement accuracy. The tool runs entirely in your browser and does not send your data anywhere.
Understanding Your Results
The tool presents several important metrics to help you interpret your mouse’s performance:
- Live Hz
- The current polling rate calculated from your most recent movement.
- Average Hz
- The mean rate across your entire test session.
- Median Hz
- The middle value, less influenced by occasional spikes or drops.
- P95 Hz
- The 95th percentile, highlighting how often your mouse maintains a high rate.
- Min/Max Hz
- The lowest and highest detected rates. Fluctuations can indicate instability or wireless drops.
A stability gauge provides a consistency score. This reflects how close your polling intervals are to each other. A high score means your mouse is delivering regular reports, which is ideal for gaming and precise work.
Tier badges show the standard polling rate your mouse meets: 125 Hz (typical office mouse), 500 Hz (mid-range), 1000 Hz (most gaming mice), up to 8000 Hz (elite models like Razer Viper 8KHz).

The live graph helps visualize trends. Sharp dips may indicate interruptions from system sleep, USB power saving, or wireless interference. Comparing your results to benchmark profiles for office and gaming mice provides context.
Keep in mind, browser-based tests depend on your system’s event timing and may under-report the true maximum rate by a small margin. However, large drops or erratic results usually signal a real hardware or setup issue.
Common Problems This Helps Diagnose
The Mouse Polling Rate Test is useful for pinpointing several common mouse-related issues:
- Unstable Polling Rates: If your mouse’s Hz fluctuates wildly, it might be due to a failing cable, poor USB connection, or wireless interference. Some cheaper wireless mice, like the Logitech M185, show large drops under load or when batteries are low.
- Not Meeting Advertised Rates: High-end gaming mice, such as the Logitech G Pro X Superlight or Razer DeathAdder V3 Pro, should consistently hit 1000 Hz or more. If the tool shows much lower averages, check for outdated drivers, firmware, or USB port compatibility.
- Inconsistent Input: Variability in polling can lead to input lag or jitter, which is noticeable in fast-paced games and precise creative work. This tool’s stability score helps spot these problems quickly.
- OS Power Management: Laptops, especially on battery, may throttle USB polling to save power. If your mouse rate drops after a period of inactivity, try adjusting Windows USB selective suspend or macOS power settings.
- Touchscreen Lag: On tablets or 2-in-1s, touch move support can reveal inconsistent response, which may be due to browser or OS-level input filtering.
By diagnosing these issues, you can take steps to improve your input experience, such as switching USB ports, updating firmware, or choosing a higher-quality mouse.
Examples and Scenarios
Scenario 1: Gaming Mouse Investigation Mark owns a Logitech G Pro X Superlight, advertised at 1000 Hz. He runs the test and gets an average of 970 Hz, with minor dips to 900 Hz. The stability score is 98 percent. The graph is steady. This confirms his mouse is performing as expected, with browser overhead accounting for the small difference.
Scenario 2: Office Mouse USB Issue Sandra uses a Dell MS116 office mouse. The test shows an average of 125 Hz but frequent drops to 70 Hz. The stability score is only 65 percent. After switching to another USB port, her average increases, and stability hits 90 percent. The problem was likely a worn-out USB port.
Scenario 3: Wireless Mouse Interference Ali tests his Logitech M720 Triathlon. The tool reports erratic Hz, ranging from 70 Hz to 200 Hz, with visible dips on the graph. He moves the USB receiver closer, away from his Wi-Fi router, and the average stabilizes at 125 Hz. Wireless interference was the culprit.
Scenario 4: Power Saving on Laptop Jin tries the test on her Razer DeathAdder V2 while on battery power. She sees the average Hz drop from 1000 Hz to 500 Hz after a few minutes. Plugging in her laptop and disabling USB selective suspend in Windows returns the average to 1000 Hz.
Scenario 5: High-Polling Mouse Validation Lucas just bought a Razer Viper 8KHz. The tool reports averages around 7900 Hz, with quick spikes to 8000 Hz and a stability score of 99 percent. He confirms his system supports high polling rates, and his mouse is working at top performance.
Scenario 6: Touchscreen Device Check Priya uses her Surface Pro to run the test with the touch move feature. Results are less consistent, with a stability score of 70 percent. She learns that browser-based touch polling is less precise than mouse hardware, which matches her real-world experience of input lag on some web apps.
Tips for Accurate Testing
For the most reliable results, follow these tips:
- Use a modern browser like Chrome or Edge. Older browsers may have less precise event timing.
- Test with your mouse plugged directly into the motherboard’s USB port, not through a hub or extension cable. Some USB hubs, especially unpowered ones, can introduce latency or drop polling rate.
- Close other intensive applications or downloads to reduce CPU and USB bus load. Background activity can cause missed events.
- Move your mouse steadily across the test area. Jerky or abrupt movements may skew interval calculations.
- Test multiple times, using 60 or 120 second windows for a better average. Short tests can be affected by random spikes or dips.
- For wireless mice, ensure a fresh battery or full charge. Low power can cause significant polling instability.
- Update your mouse drivers and firmware using manufacturer software, such as Logitech G HUB or Razer Synapse.
- Check your OS settings. On Windows, disable USB selective suspend. On macOS, avoid running on low-power mode.
- If using touch move, expect less precision due to browser and OS filtering. The tool is best for hardware mice.
- If results seem unusually low, try a different USB port, cable, or computer to rule out hardware issues.
Browser vs Desktop Software
Browser-based polling rate tests are fast and convenient. They don’t require installation, work across platforms, and provide results within seconds. However, they do have technical limitations. Browsers rely on the operating system’s input event timing, which can introduce small delays or miss ultra-fast polling bursts, especially above 1000 Hz.
Desktop software, such as MouseTester or manufacturer's diagnostic tools, can access lower-level system APIs for more accurate polling rate detection. They often provide higher resolution data and can record input while games or high-refresh-rate apps are running. For example, MouseTester can capture sub-millisecond intervals reliably with mice like the Razer Viper 8KHz on Windows 10/11.
If you need absolute accuracy or want to debug issues during gaming, consider using dedicated desktop tools. For general troubleshooting, comparison, or setup validation, browser tools like this one provide a fast and accessible solution for most users. Always interpret browser test results as approximate, but actionable, especially if you see large or consistent gaps in polling.
Summary
The Mouse Polling Rate Test offers a simple way to check your mouse’s actual performance in real time. It measures how frequently your mouse reports position changes, visualizes stability, and compares your results to popular office and gaming mice. This tool is ideal for diagnosing connection issues, verifying advertised specs, or optimizing your setup.
While browser-based analysis is limited by system and browser timing, the results are accurate enough for most troubleshooting scenarios. For the most demanding accuracy or in-depth research, desktop software is recommended. With features like high-resolution interval analysis, tier badges, and CSV export, this tool helps users of all experience levels ensure their input devices are running at peak performance.
Frequently Asked Questions
How accurate is the Mouse Polling Rate Test in a browser?
Browser-based polling rate tests measure how often your mouse's movement events are detected by your system and browser. While the tool uses high-resolution timing, results may be slightly lower than the true hardware maximum, especially above 1000 Hz. Small timing delays can occur due to the browser, operating system, or background activity. For most users, the results are close enough to diagnose hardware problems, but for absolute precision or high-speed mice, dedicated desktop software like MouseTester offers more accurate readings.
What is mouse polling rate and why does it matter for gaming?
Mouse polling rate is the frequency, measured in Hertz (Hz), at which your mouse reports its position to your computer. Higher polling rates mean your cursor updates more often, reducing input lag and improving tracking accuracy. For gaming, especially in fast-paced shooters or esports titles, a high polling rate (1000 Hz or above) ensures more responsive and precise control. Office mice typically run at 125 Hz, while gaming mice like the Logitech G Pro X Superlight or Razer DeathAdder V3 Pro reach 1000 Hz or higher.
Why is my mouse polling rate lower than advertised?
If your mouse is not reaching its advertised polling rate, several factors could be at play. Common causes include outdated or missing drivers, USB port compatibility issues, power-saving settings (like USB selective suspend in Windows), or using a USB hub. Wireless interference or low battery can also lower polling rates on wireless mice. Make sure your mouse firmware and drivers are up to date, and try connecting the mouse directly to the motherboard. Refer to your mouse's software, such as Logitech G HUB or Razer Synapse, to configure the polling rate if available.
How do I increase my mouse polling rate?
To increase your mouse polling rate, check if your mouse supports configurable rates. Gaming mice from brands like Razer, Logitech, Corsair, and SteelSeries often let you set polling rates (125 Hz, 500 Hz, 1000 Hz, or higher) in their software. Install the appropriate software, then select the maximum supported rate. For some mice, a physical button or switch on the underside may change the rate. Make sure to connect the mouse directly to a USB port on your motherboard for best results, and avoid using hubs or extenders that can lower performance.
What polling rate should I use for FPS games?
For first-person shooters (FPS) and other fast-paced games, a polling rate of 1000 Hz is recommended. This ensures quick response and minimal input lag. Most modern gaming mice, such as the Logitech G Pro X Superlight or Razer DeathAdder V3 Pro, support 1000 Hz by default. Some high-end models, like the Razer Viper 8KHz, offer rates up to 8000 Hz, but benefits beyond 1000 Hz are only noticeable with high-refresh-rate monitors (240 Hz or above). Use the highest stable rate your mouse and system support.
Can polling rate affect mouse cursor jitter or lag?
Yes, low or unstable polling rates can cause visible cursor jitter, input lag, or stuttering, especially during fast movements. This is more noticeable in games and graphic design. A consistent high polling rate ensures smooth cursor movement and accurate input tracking. If you notice jitter or lag, use this tool to check your mouse’s rate and stability. Address potential causes like USB port issues, wireless interference, or power-saving settings to improve performance.
How do I test the polling rate of a wireless mouse?
To test a wireless mouse, use the Mouse Polling Rate Test in your browser. Move your mouse steadily in the test area and observe the live Hz and stability score. Make sure the mouse battery is charged and the wireless receiver is close to the mouse, away from sources of interference like Wi-Fi routers. If your wireless mouse supports multiple modes (Bluetooth, 2.4 GHz dongle), test both, as 2.4 GHz typically offers higher and more stable polling rates than Bluetooth.
Why does my polling rate drop during use?
Polling rate drops can be caused by several factors: USB power management (especially on laptops), wireless signal interference, low battery, or the computer entering low-power states. Background processes or heavy CPU load can also cause missed events in the browser. Try disabling USB selective suspend in Windows or similar power-saving features on macOS. For wireless mice, keep the receiver close and replace batteries as needed. If the problem persists, test on another computer or try a different USB port.
Is there a difference between polling rate and DPI?
Yes, polling rate and DPI are different measurements. Polling rate (Hz) measures how often your mouse reports its position to the computer, affecting input lag and responsiveness. DPI (dots per inch) measures the sensitivity of the mouse sensor, determining how far the cursor moves per unit of physical movement. High DPI allows for faster cursor movement, while high polling rate ensures more frequent updates. Both are important for gaming, but serve different purposes.
Can I test my mouse polling rate on a Mac or Linux system?
Yes, the Mouse Polling Rate Test runs in any modern browser, including Chrome, Firefox, and Safari on macOS and Linux. The browser captures mousemove events regardless of operating system. However, OS-level input handling may affect timing precision, and macOS sometimes filters very fast events. For the most accurate readings, use a recent browser version and connect your mouse directly to the computer, not through a hub.
Does polling rate affect battery life on wireless mice?
Yes, higher polling rates consume more power because the mouse sends more frequent updates to the receiver. Some wireless gaming mice, like the Logitech G Pro X Superlight, balance polling rate and battery life by offering multiple performance modes. For general use, 125 Hz or 250 Hz is usually sufficient and conserves battery. For gaming, use 500 Hz or 1000 Hz if your mouse supports it, but expect reduced battery run time at higher rates.
Why does my mouse feel laggy even at high polling rates?
Laggy mouse feel can result from several causes, not just polling rate. High system CPU or RAM usage, background processes, USB bandwidth issues, outdated drivers, or display input lag can all contribute. Even with a 1000 Hz mouse, if your system is under heavy load or your monitor has high input latency (common with some TV panels), you may feel lag. Make sure your operating system and drivers are up to date, use a direct USB connection, and minimize background activity when gaming.
How can I export my results for analysis?
The Mouse Polling Rate Test offers CSV export of your session data. After running the test, click the export button to download a CSV file. This file includes timestamped polling intervals and calculated rates, which you can analyze in Excel, Google Sheets, or other data analysis tools. This is useful if you want to track changes over time, compare multiple mice, or share results with support teams.
What are tier badges and what do they mean in this tool?
Tier badges in the Mouse Polling Rate Test indicate which standard polling rate your mouse meets during the test session. Common tiers are 125 Hz, 250 Hz, 500 Hz, 1000 Hz, 2000 Hz, 4000 Hz, and 8000 Hz. The badge lights up when your measured average rate meets or exceeds that tier. This helps you quickly see if your mouse is performing at office, mid-range, or high-end gaming levels. For example, a Logitech G Pro X Superlight should achieve the 1000 Hz badge, while a Razer Viper 8KHz can reach the 8000 Hz badge on a compatible system.
Can I use this tool to test touchscreen or stylus polling rate?
Yes, the tool supports touch move input, allowing you to test how often your touchscreen or stylus updates position. However, browser-based touch event timing is less precise than mouse hardware polling, and results may be affected by OS-level filtering or browser limitations. This feature is mainly useful for comparing different devices or identifying large inconsistencies, but it won’t match the accuracy of mouse hardware tests.
What should I do if my mouse fails to reach stable polling rates?
If your mouse shows unstable or low polling rates, start by checking your connection. Use a direct USB port on the motherboard, avoid hubs, and try a different cable or port if available. Update your mouse drivers and firmware. Replace batteries or recharge if wireless. Check for power-saving settings like USB selective suspend in Windows. If the problem continues, test the mouse on another system to rule out hardware failure. For persistent issues with high-end mice, contact manufacturer support for further diagnostics.
Related Tools
Free tools to analyze, compare, and optimize your PC gaming performance
Mouse Latency Test
Measure mouse input latency, click latency, jitter and response consistency directly in your browser.
Use Tool →Mouse Tester
Test every mouse button, scroll wheel, clicks per second and double-click performance in one online tool.
Use Tool →Mouse Button Test
Test every mouse button online including left, right, middle, side buttons and scroll wheel. Detect faulty switches, dou
Use Tool →Mouse Speed Test
Measure mouse speed, acceleration, IPS and movement performance in real time with interactive charts.
Use Tool →Popular Game System Requirements
Check if your PC meets the requirements for these popular games
Benchmark data from PassMark and publisher specs. Calculators run locally in your browser — we never upload your hardware info.